
A power outlet with USB ports is ideal for charging gadgets at home or the workplace. Here’s how to set one up.
While USB ports are becoming increasingly popular in homes, some still do not have them. Don’t worry if you find yourself in this situation: adding a USB outlet is a straightforward process. The six steps required for effective installation are outlined below. But first, consider the advantages of adding a USB power outlet.
The Advantages of a USB Power Outlet
A USB power outlet has been put on the wall and is operational. You may ask why you require a USB power outlet in your house. After all, most of our devices now come with their chargers, and there are several DIY phone chargers that anybody can construct, so why do we need another?
Here are two critical reasons:
You never know when you’ll require an additional charger. You can charge your devices if you have a USB power outlet, even if you can’t find your charger or your computer’s USB ports aren’t working.
In addition, a USB power outlet is handier than a normal one. You may use it to charge your gadgets without worrying about how the plug is inserted.
What You’ll Require

- USB power outlet, screws, screwdriver, and wire cutter
A few tools are required to install a USB power outlet.
Here are a few examples:
USB power outlet: This is available at any local hardware shop.
To drill holes in the wall, use a power drill.
Screws: Used to save the USB power outlet to the wall.
Screwdriver: To loosen the screws used to install the wires.
Use a wire cutter to cut and remove the outer cover of the wires and splice them into the existing ones.
Any USB cable and phone: See if the power outlet is operational.
Once you’ve gathered all your materials, follow the steps below to add USB charging capability effortlessly to any room in your house or workshop.
Important Safety Reminder: Always switch off the main’s electricity before working on any main wiring in your house or workplace to avoid electric shocks.
If in doubt, seek the advice of an experienced electrician.
Step 1: Locate the Location of the Outlet
- Before drilling to attach the USB power cord, mark the wall.
- The outlet should be close to the charging gadgets and easily accessible.
- One method for determining the ideal position is to map out the locations of all the devices using the outlet.
- This will ensure that the outlet is situated in an accessible location.
- For example, if you want to charge your phones, you may add a USB power outlet near your couch or bed.
- The length of the cables used to charge gadgets. The outlet should be close enough to other outlets so that cables do not become stretched or tangled.
- Furthermore, you may replace current power outlets with USB outlets.
- Once you’ve decided on a position for the outlet, make sure it’s clean and debris-free, and mark it with a pencil or pen.
Step 2: Drill two pilot holes
- Make two pilot holes with a drill for the screws that will hold the outlet.
- When drilling pilot holes, use a bit that is slightly smaller in size than the screw.
- This will provide a tight fit and help hold the screw in place.
- You may also make an aperture in the wall to install the USB outlet and casing, which should fit snugly.
- As illustrated below, the case frequently comes with two pieces on each side that may accommodate the screws.
Power wires and holes for screw support
Step 3: Remove the screws from the USB Outlet.
- Taking the screws off of the USB power outlet
- Using the screwdriver, loosen the screws slightly.
- This will allow the power source’s cables to flow through effortlessly.
- To confirm that anything is in working order, tighten the screws again after the wires are in position.
- If you don’t have screwdrivers, you can loosen the screws using a paperclip or other tiny item.
- Just make sure you don’t lose them when you loosen them.
Step 4: Remove the Power Cables’ Plastic Covering
- Remove the plastic covering off the wires with a wire cutter.
- To remove the plastic covering from the three power cords, turn off the power at the main switch!
- Then, using a wire cutter, gently remove the plastic away from the wires.
- You should be able to watch the exposed wires once it’s been taken away.
- Remove just enough plastic to allow the wires to be put quickly into the USB socket.
Step 5: Place the screws in the holes.
- After placing the screws into the USB outlet, tighten them into the pilot holes.
- When putting in the screws, take care not to overtighten them since this might peel the threads and make removing the outlet difficult.
- You may also leave it slack to make inserting the wires easier in the next step.
- If you’re having trouble starting the screws, consider using a slightly bigger drill bit to enlarge the pilot holes.
Step 6: Connect the Wires to the USB Power Outlet
- Electrical wire colors differ from country to country.
- In the United States, neutral is white, life is black, and the earth is green.
- Before connecting your USB outlet, double-check the standard wiring colors in your area.
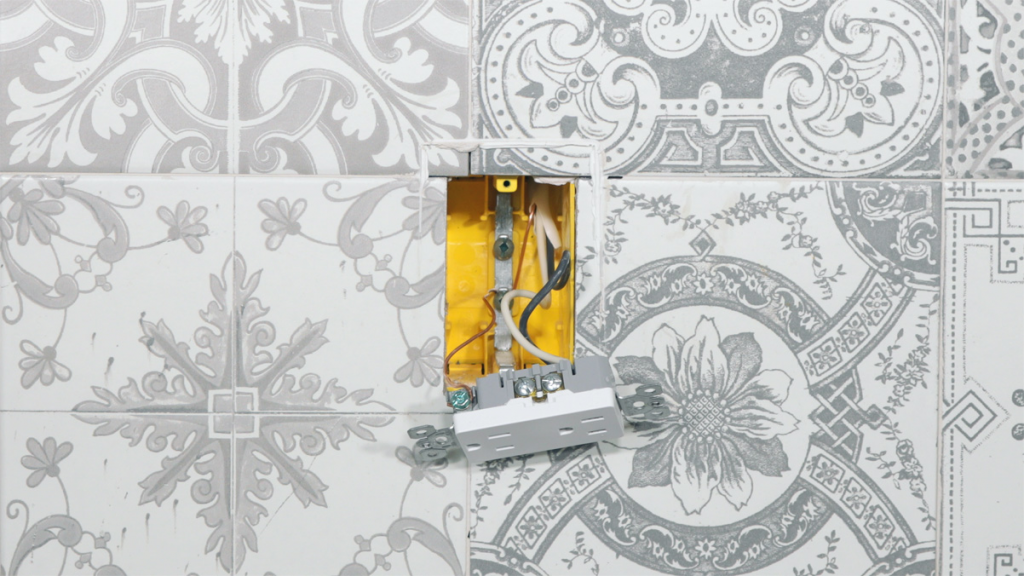
Connecting the power source’s cables to the USB power outlet
To connect the wires, make sure the live wire (red in our example photographs) goes to the “L” port, and the neutral wire (black in our example) goes to the “N” port.
We’ll show you how to identify them in the video below.
Using the USB power outlet to demonstrate the live and neutral ports After that, plug the earth wire (green) into the remaining port. Finally, secure each of these wires using a wire connection. Once the cables are connected, screw on the faceplate and switch it on to test it.
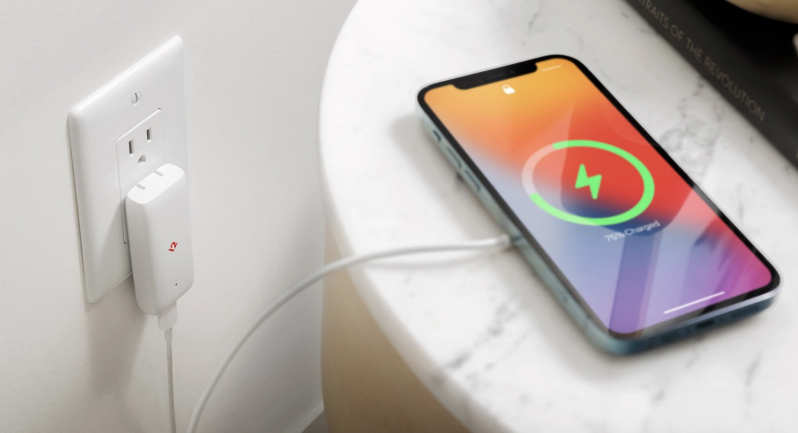
You may test if a gadget is charging properly by charging it. The picture below depicts the phone being charged via a USB power source. You have just installed your USB power outlet successfully!
Using a USB power outlet to charge an iPhone
Common Problems with Installing a USB Outlet
Here are some of the most specific problem encountered while attempting to install a USB power outlet, as well as solutions to them:
The outlet is in an odd place, making it difficult to reach or in the way of other items in your home. It is critical to put the USB power outlet in the correct area.
Incorrect wiring: Ensure the outlet is correctly connected and the polarity is correct. Incorrect wiring might harm your gadgets or cause them to malfunction. Check for loose connections: Make sure all of the links are snug. Loose connections can disrupt electricity transmission and create fire concerns.
Damaged outlets: If the outlet is damaged, it must be replaced. Examine the outlet for cracks, burns, and other damage.
Overheating: If your outlet or gadgets are overheating, this might indicate a problem with the power supply. Examine for any loose connections, broken outlets, or other possible problems.
Charge Your Devices Without straining Yourself
You should be ready to easily install your USB power outlet anyplace in your home or business. With this useful new feature, you can charge your devices without having to worry about locating the correct charger, and you’ll also be able to charge numerous devices simultaneously. Just be sure to take all necessary measures when dealing with electricity. If you run into any problems, contact an electrician.


