
How to Update in Windows 10 Drivers Using Command Prompt? Some easy steps
The Command Prompt remains near and dear to the users familiar with all the system’s right and wrong-doings. For installation/uninstallation of apps to complete system scan, registering or de-registering a program to fix any glitch in the system, that Command Prompt is a service to extract help from system elements errors.
You can also do Command Prompt to update the driver in your Windows 10. How to do this? This article is all about that wherever you can know how to update in Windows 10 drivers Using Command Prompt.
Update Drivers Using Command Prompt
Windows gives you a PnPUtil tool integration, which can help you download a driver package, install/add the driver and if you want to uninstall it in the future, it also enables you to remove the driver of the list. Permit us to get a look at the steps that can help use Command Prompt to update drivers in Windows 10.
To start with this method, you primarily have to download or transfer the driver package on your computer. You can now download it by visiting the OEM website or do the pen drive to transfer the package within your PC.
Once you should download/transfer the driver package on your computer, you can install it using the PnPUtil.exe tool by opening the INF file’s path with features of the driver that wants to do installed.
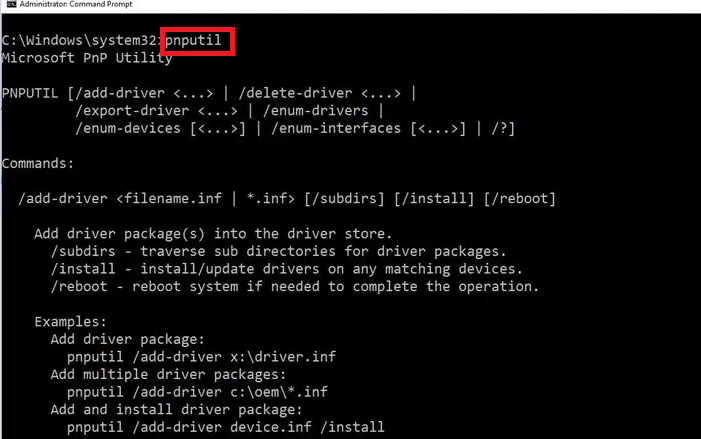
PnPUtil Syntax
pnputil [/add-driver <…> | /delete-driver <…> |
/export-driver <…> | /enum-drivers |
/disable-device <…> | /enable-device <…> |
/restart-device <…> | /remove-device <…> |
/scan-devices <…> | /enum-devices <…> |
/enum-interfaces <…> | /?]
Here is the Method to update the driver in your Windows 10 using command prompt:
- Go to the Start button (Windows icon) into the bottom left of your desktop.
- Now, typewrite Command Prompt in the search bar.
- Then, right-click on the result and select Run as administrator from the right-click menu and open the Command Prompt by admin rights.
- Once you are at the Command Prompt window, go the command to pick up the syntax and the examples and next click Enter Pnputil.
How to Add a Driver
If you see for a method to add the driver, here are the steps that you can follow:
- File Explorer Open and move to the folder location wherever the driver you want to add is saved.
- Now, this you have opened the folder location and copy the driver folder.
- Now you have to open the drive where you want to paste the copied driver folder. Once you are in the drive, directly paste the copied folder.
- Then, run to the Command Prompt and run the command to add and install the driver package.
How to Remove a Driver
Thus much, you have come over the ways to install a driver using Command Prompt. If you need to remove the installed driver, here are the starts that you need to follow.
- This Command Prompt window Open and run the following command. Next Enter click: pnputil.exe -e
- Then, note down the OEM number of the driver you need to delete.
- Besides, run the below-written command to remove the driver package and hit Enter: pnputil.exe -d OEM number.
Manage Your Drivers Using Command Prompt
Then, that was it for updating in Windows 10 drivers using Command Prompt. It is quite an easy technique to update, install, or even delete a driver in your Windows PC. Did you see this article helpful? Used beloved to read your opinions and suggestions in the comment way.


![How To I Fix [pii_email_0642b6407de1d9fad1d4] Outlook Error](https://www.techfans.net/wp-content/uploads/2021/02/Untitled-63-100x75.png "How To I Fix [pii_email_0642b6407de1d9fad1d4]")